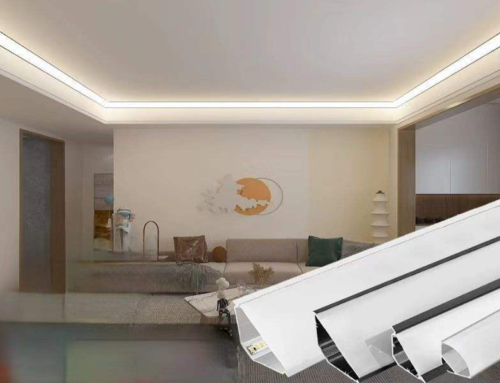
LED linear lights have become increasingly popular in modern interior design due to their sleek appearance, energy efficiency, and ability to create soft ambient lighting. Installing a ceiling top corner LED linear light can enhance the atmosphere of a room while providing functional illumination.
Installation Video
To help you better understand the installation process, you can watch the step-by-step installation video below.
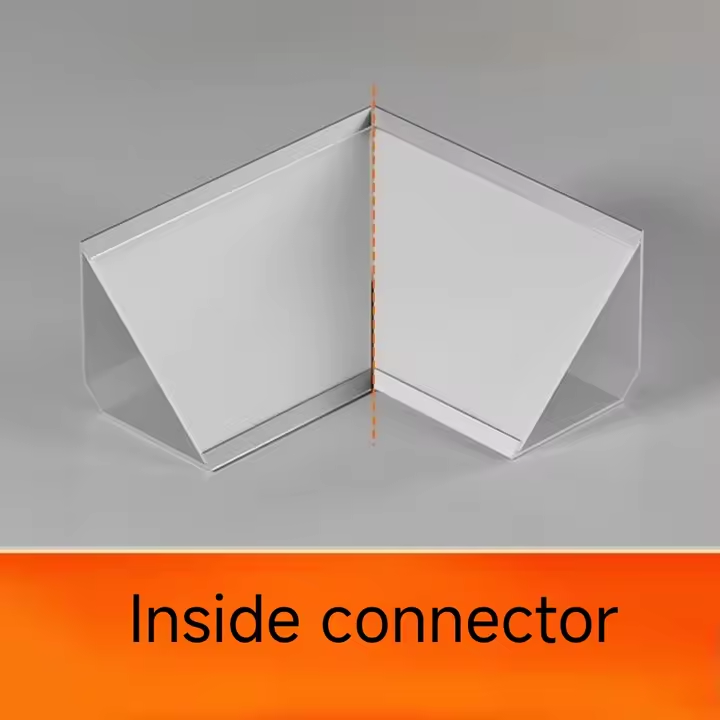
Corner Connectors for Easier Installation
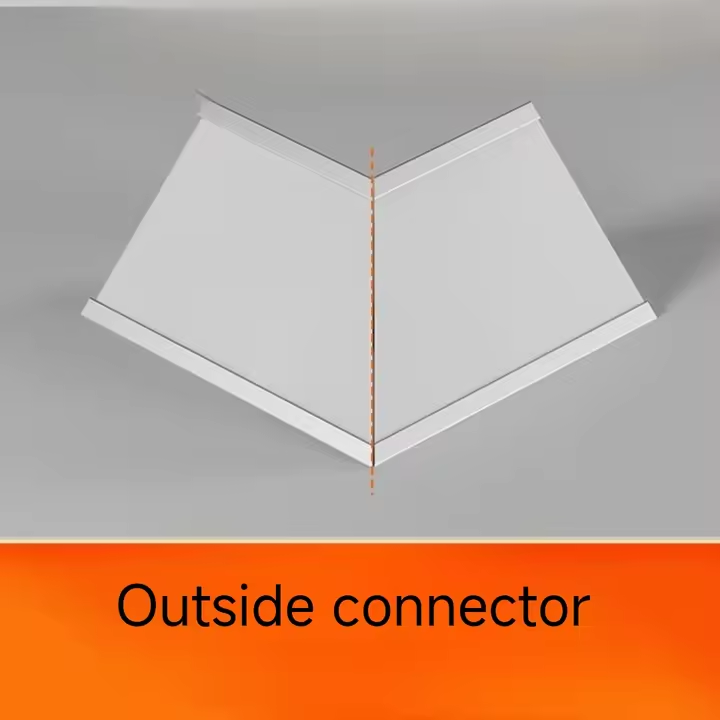
Many customers prefer to install LED linear lights with corner connectors when the lighting needs to run along ceiling corners. These connectors help create a clean and continuous lighting effect at the corners.
However, some customers may not have the tools or experience to cut the aluminum profiles accurately, especially when making a 90-degree corner connection. Cutting precise angles can be difficult without professional equipment.
As a supplier, we understand this challenge. If customers require it, we can help pre-cut the aluminum profiles and prepare both 90-degree inner corner connectors and 90-degree outer corner connectors before shipment. This service helps customers save installation time and ensures a more precise and professional lighting result.
1. Prepare the Tools and Materials
Before starting the installation, make sure you have the necessary tools and materials ready. These may include:
LED linear light profile
LED strip light
Power supply (driver)
aluminum profile
Screws
Drill and screwdriver
Measuring tape
Wire connectors
Having everything prepared will make the installation smoother and more efficient.
2. Measure and Plan the Installation Area
Measure the length of the ceiling corner where the LED linear light will be installed. Accurate measurements ensure the aluminum LED profile fits properly along the corner. Mark the positions where the mounting clips or aluminum profiles will be fixed.
Planning the layout in advance helps achieve a clean and professional lighting effect.
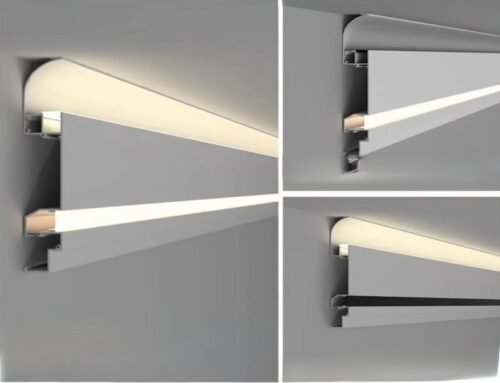
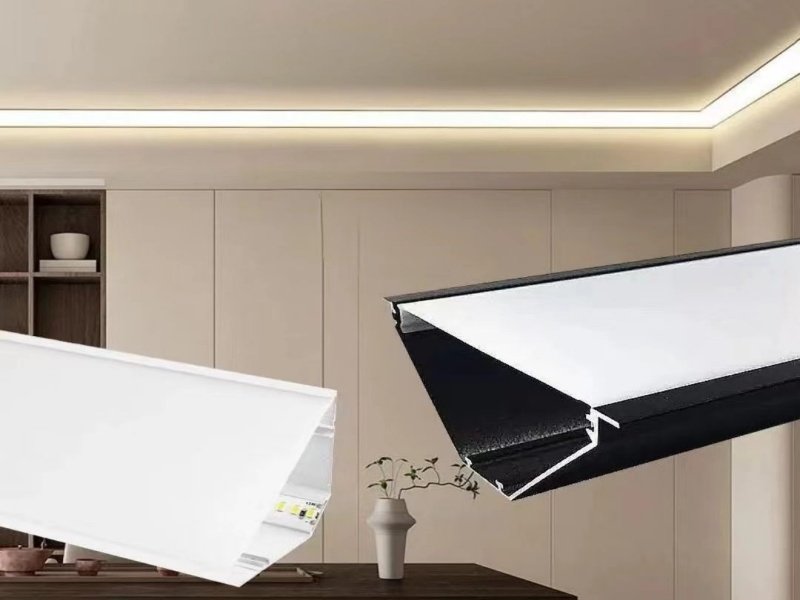
3. Install the Aluminum Profile
The aluminum LED channel profile is usually installed along the ceiling corner to hold the LED strip securely and help dissipate heat. Fix the mounting clips or directly screw the aluminum profile into the wall and ceiling corner according to the marked positions.
Make sure the profile is straight and firmly attached.
4. Install the LED Strip
Carefully place the LED strip inside the aluminum profile. Most LED strips have adhesive backing, which allows them to stick firmly to the profile surface. Ensure the strip is aligned properly and avoid bending it excessively.
5. Connect the Power Supply
Connect the LED strip to the appropriate power supply or driver. Check the voltage compatibility, such as DC12V or DC24V, to prevent damage to the light. Secure all wiring connections and ensure proper insulation.
Before final installation, test the light to confirm that it works correctly.
6. Install the Diffuser Cover
Once the LED strip is working properly, place the diffuser cover onto the aluminum profile. The diffuser helps soften the light and create a smooth linear lighting effect without visible LED dots.
7. Final Inspection
After installation, check the alignment and lighting effect. Make sure all components are secure and the wiring is safely hidden. Once everything is confirmed, the installation is complete.
Conclusion
Installing a ceiling top corner LED profile light is a practical way to enhance interior lighting and create a modern atmosphere. With proper measurement, careful installation, and the right components, the process can be straightforward and rewarding.
If you want to get a sample to test this ceiling top corner LED Profile for testing, just contact us to get more details and the samples.